Network congestion can wreak havoc on critical tasks, especially when bandwidth-hungry applications like backups hog the line. Peplink QoS Application Queue feature offers a solution, allowing you to prioritize traffic and ensure smooth operation of essential services. Here’s a very short guide onhow to set it up.
Accessing the QoS Application Queue
Start by logging into your Peplink BR1’s web admin interface. Navigate to the Advanced section, then QoS, and finally to QoS Application Queue. This is where you’ll create your custom queues to manage application priorities.
Creating a New Queue
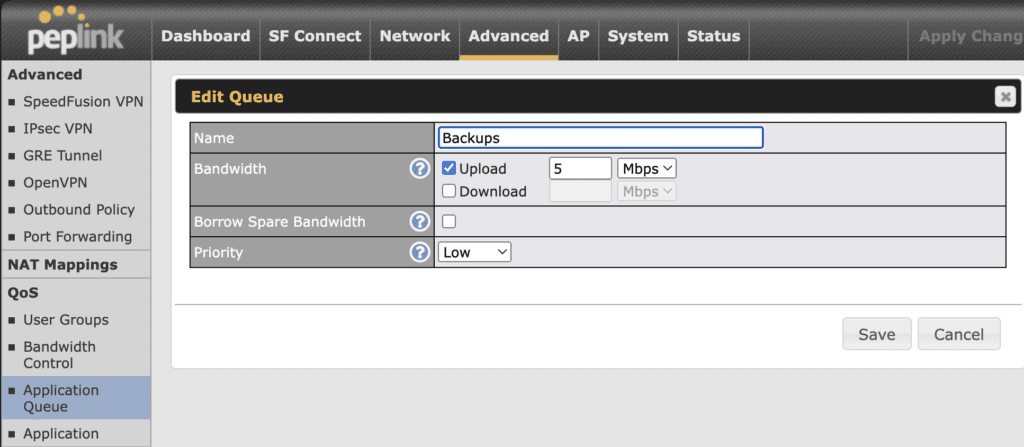
To create a queue, click the Add button. You’ll need to provide a name for easy identification. The crucial setting here is the Bandwidth field, where you specify how much bandwidth to reserve for this queue on each WAN connection. This ensures that even during heavy network usage, applications assigned to this queue will have guaranteed resources.

For added flexibility, consider enabling the “Borrow Spare Bandwidth” option. This allows applications in the queue to utilize additional bandwidth when it’s available, maximizing efficiency without compromising your prioritization scheme.
Assigning Applications to Queues
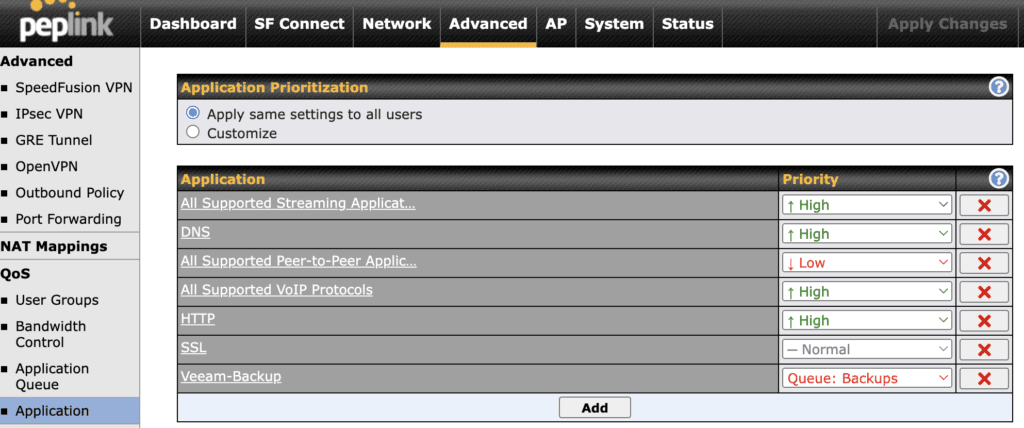
Once you’ve set up your queues, head to Advanced > QoS > Application. Here, you can either create new application rules or modify existing ones. The key step is selecting the appropriate queue in the priority settings for each application.
By carefully assigning applications to your custom queues, you can effectively control how your network resources are allocated. For instance, you could create a low-priority queue for backup tasks, ensuring they don’t interfere with more time-sensitive operations during business hours.

This QoS setup allows you to fine-tune your network performance, balancing the needs of various applications and users to maintain optimal productivity.
You can see the results easily in my monitoring graphs ! That’s not much but it’s the difference between saturated upload and usable internet !

