
In this guide we’ll walk through setting up Tailscale’s experimental Identity Provider (tsidp) inside a lightweight Debian Proxmox container. We’ll create the container, install Go, build the binary, configure systemd with environment variables, and run tsidp as a dedicated user.
This is a very raw howto, copy paste ready, based on my attempts, target audience is homelaber. Comments welcome !
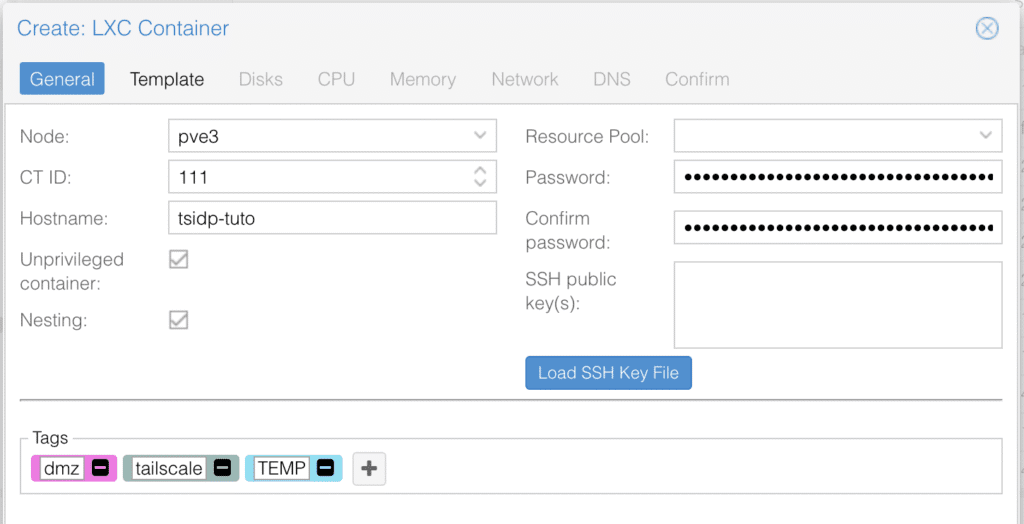
1. Create a Proxmox container
- Debian template (Tested with debian-12-standard_12.7-1_amd64.tar.zst)
- Resources: 512 MB RAM, 1 vCPU, 8 GB disk
- Set the CT as unprivileged for security
2. Update system and install dependencies
Enter VM console and let’s start initial setup !
# Start from a clean OS
apt update && apt upgrade -y
# Install git and wget
apt install -y git wget
Download and install Go 1.24.7 manually:
wget https://go.dev/dl/go1.24.7.linux-amd64.tar.gz
tar -C /usr/local -xzf go1.24.7.linux-amd64.tar.gz
echo 'export PATH=$PATH:/usr/local/go/bin' >> ~/.bashrc
source ~/.bashrc
Verify:
root@tsidp-tuto:~# go version
go version go1.24.7 linux/amd64
3. Clone tsidp
git clone https://github.com/tailscale/tsidp.git /opt/tsidp-src
4. Build and install binary
cd /opt/tsidp-src
mkdir /opt/tsidp
go build -o /opt/tsidp/tsidp .
5. Configure systemd service
Create a dedicated user:
# Create tsidp user with home and no hsell
useradd -r -m -d /home/tsidp -s /bin/false tsidp
Create your TS_AUTHKEY :
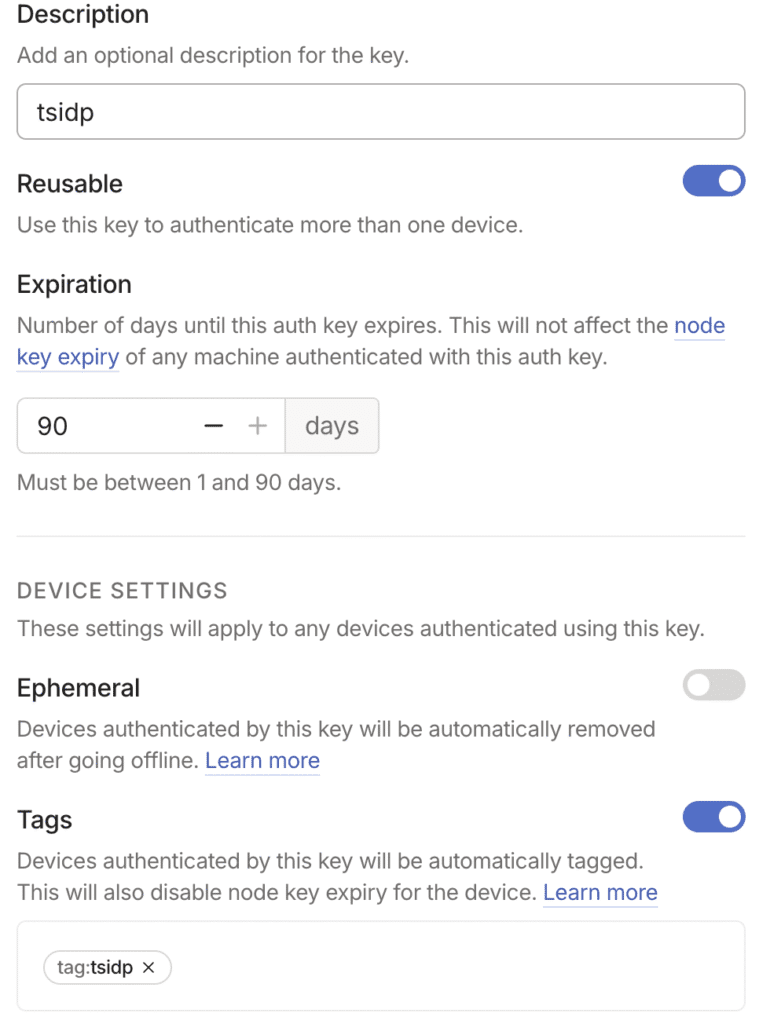
It’s important to create a reusable key so that the service can restart itself.
The README says “Ensure you select an existing tag or create a new one.”
So I created a “tsidp” tag for this purpose.
Create environment file with your newly created key:
cat >/opt/tsidp/.env <<EOF
TSNET_FORCE_LOGIN=1
TS_AUTHKEY=tskey-auth-xxxxxxxxxxxx
TAILSCALE_USE_WIP_CODE=1
EOF
Systemd unit /etc/systemd/system/tsidp.service:
[Unit]
Description=Tailscale IDP
After=network.target

[Service]
WorkingDirectory=/opt/tsidp
EnvironmentFile=/opt/tsidp/.env
ExecStart=/opt/tsidp/tsidp
Restart=on-failure
RestartSec=5
User=tsidp
Group=tsidp

[Install]
WantedBy=multi-user.target
Enable service:
systemctl daemon-reload
systemctl enable --now tsidp
6. Recap & Next steps
Once started, you can check whether tsidp is running correctly:
systemctl status tsidp
Or follow logs in real-time:
journalctl -u tsidp -f
Look for messages like tsidp server started or AuthLoop: state is Running which confirm that the embedded Tailscale client has initialized successfully.
You now have tsidp running inside a minimal Debian Proxmox container, with proper environment separation and persistent state. This setup is lightweight, reproducible, and suitable for lab testing.
Stay tuned for next steps !